Showing posts with label Tutorials. Show all posts

Saturday, December 24, 2011

Men's Hat in Blue and White


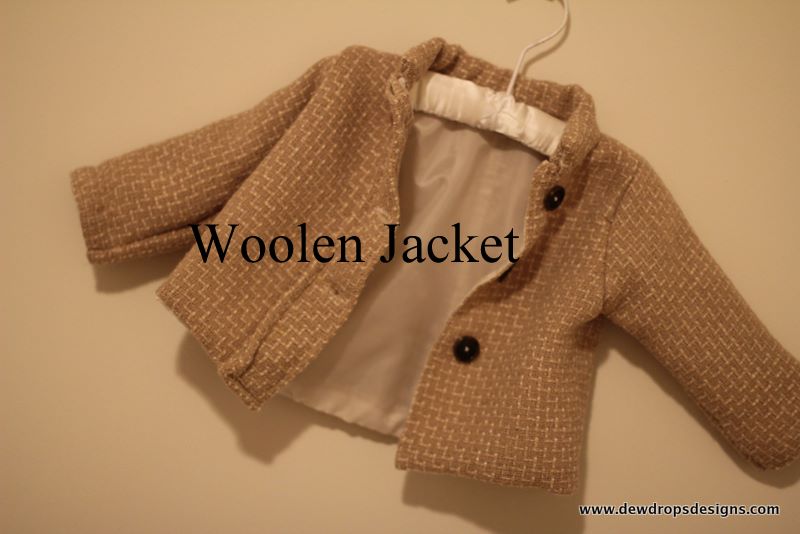
I was keeping busy with so many projects these days that I have couple of items that are completed yet to be added up here. Thought of sharing this hat pattern for Men. This is the first time I am sharing a Knitting pattern here. Hope it helps.. DO let me know if you come across any errors in the pattern. I have written this pattern after making 2 hats of 2 different sizes of the same color pattern.

Materials :
1 Skein Lion Brand Wool ease Blue(Col A)
1 Skein Lion Brand Wool ease White(COl B)
Double pointed knitting Needles or Circular Knitting needle(4.7mm)
Tapestry needle

Abbreviations:
K- Knit, P - Purl, sts - stitches, p2tog - Purl 2 stitches together

With Col A Cast on 68 sts on dpn or circular knitting needle. Join
Round 1 : k2 , p2 around (2*2 Ribbing)
repeat Round 1 until the work measures 1.5"


Color Pattern Followed :
Set A: Next 4 Rounds: Purl around
Set B: Next 2 Rounds : With Col B Purl around
Continue Set A & Set B Until work from beginning measures 8"

Now the Top of the hat  Decrement go as follows: (Continue doing this with  color pattern as used until now: 4rows purl with Col A & 2 Rows Purl with Col B)

Round 1: *p2tog,  p11, Repeat for 5 times, p3
Round 2: purl around
Round 3: *p2tog, p7, repeat around
Round 4: purl around
Round 5: *p2tog, p6, repeat around
Round 6: Purl Around
Round 7: *p2tog, p5, repeat around
Round 8: Purl around
Round 9: *p2tog, p4, repeat around
Round 10: Purl around
Round 11: *p2tog, p3, repeat around
Round 12: purl around
Round 13: *p2tog, p2, repeat around
Round 14: purl around
Round 15: *p2tog, p1, repeat around
Round 16: purl around
Round 17: *p2tog, repeat around

Cut a long tail. Using tapestry needle or crochet hook pass this through remaining stitches pull tight and weave in ends..

Wednesday, November 9, 2011

Cozy Woolen Jacket

Looks like my little one is warm and cozy in her new suit :)


So are you all interested in sewing a Jacket with lining for this Winter. If so here I give you some tips with some pictures for simple Woolen Jacket. I have not included step by step tutorial for this. But I hope few tips and pictures here would give a good idea of how to make this. If you are novice to sewing It would be a bit difficult for you to grasp this just with the very little information I provide here. The one I made here is for 6months- 12months baby size. But If you follow the instructions and modify it  you can just make it for any size of your choice.

Material Required:
Wool / Wool Blend Fabric : 3/4 " yd(58/60" wide)
polyester Lining :  1yd(45" wide)
Buttons: 3

For Front and Back piece:

Cut Back and Front piece together using measurements from a loose fitting dress. The length should be X(Your desired length for Jacket) + 1/2"(seam allowance). Now cut the front piece along the middle as you see in picture . The lining piece and the actual fabric should be cut in the same way with same measurements for back and front.

Now attach the 2 front pieces to the back piece with right side facing. Now you have 2 different pieces , one for lining and other actual fabric. Next step is to attach the lining  to the actual fabric. With Right side facing  as shown in picture sew along the sides and neck opening. Do not sew the shoulder and arm holes together. Now turn the pieces right side out and sew in the shoulder pieces.


Hands:
Cut 4 pieces ( 2each from lining and actual fabric) For hand.
Now with right side facing sew along the bottom part of pieces (lining and actual fabric) together. Now turn it out and sew along the sides. Now you get a piece as shown in picture. Do this for both the arm pieces. Now attach the hands to the already sewn piece.

Next step is to hem the bottom. You can use either blind hem using sewing machine or with hands. I did blind hem with hand sewing.

Now you can add the plackets for front opening and collar. This is similar to the kurta tutorial here http://www.dewdropsdesigns.com/2011/10/kurta-for-men.html

As this is my first try on jacket with lining It was a kind of learning phase for me too. So it took me a while to get everything in place. But I am happy that I have got some idea into how I can make it better next time. 


Thursday, November 3, 2011

Leg Warmers in Pink & White


Just made a leg warmer in pink and white for my little one. Thought of sharing the pattern here...

Pattern:(6-12Months) -- Make 2 for both legs
Hook : Size G(4.25mm)
Yarn used: Light weight Yarn in Pink(Col A) and White(Col B)

Round 1: With Col B Ch 40, ss to first ch, turn
Round 2: Ch 3, * dc in next st, ch1, skip nexk st*, Rep from *-* across, ss to first dc turn
Round 3: Ch3, puff stitch in every Ch space across, ss to first Ch3, turn
Round 4: Join Col A Ch2, hdc in each st across, ss to first hdc, turn
Round 5: Ch 1, *sc in next 8 sts, 2sctog* Repeat ** 4 times, ss to first sc turn
Round 6: Ch3, dc in each st across, ss to first dc, turn
Round 7-8: Repeat round 6
Round 9: Ch 3, *dc in next 7 sts, 2dctog* repeat ** 4 times, ss to first dc, turn
Round 10: Ch3, dcin each st across, ss to first dc, turn
Round 11-12: Repeat round 10
Round 13: Ch1, sc in each st across, ss to first sc, turn
Round 14: Ch2, hdc in each st across, ss to first hdc, turn
Round 15: Join Col B Ch3, *puff stitch, ch1, skip next stitch*, repeat *-* across, ss to first st, turn
Round 16: Repeat Round 15, Fasten off , Weave in Ends


Monday, October 31, 2011

Kurta for Men

Every time I post here something for baby girl or women. So this time there is a change in my routine. This is something for men.
It was on the day before of the Diwali celebrations it came up to my mind why not make some ethnic wear for my husband. I have never tried sewing men wear or accessories till date. Even after buying the fabric I was not so sure about how it is gonna turn out. I bought 2.25yds of the fabric from Hancock fabrics. You can find the one I used here Satin Fabric

I am quoting here in few pictures and some details about how to make this kurta.
First do take a t-shirt that loosely fit for the one who you are making it for. This is just for shoulder and arm hole measurements. Rest of the measurements you have to take.
1) Measure from shoulder to knee or till where you want the kurta: A
2) Shoulder to Wrist : B
3) Hip : C
4) Shoulder to Hip : D

Front and Back
Now Mark your fabric with the measurements you have taken now as shown in picture for front and back and cut it.
Cut 2 pieces for plackets. You can find tutorial here : Placket tutorial . Or else there are many tutorials in youtube on how to make plackets.

Attach the shoulder for front and back pieces with right sides facing. Now add the plackets for desired length. I have made 8" placket with 3 button. You can create button holes with hand or with machine if you have a machine that supports button hole creation. Also add the buttons. 

Hands:

Now that you have the front  and back piece with the plackets done it is time to give hands for the kurta
Cut 2 pieces for the hands with length B from centre of the piece, arm hole width can be measured keeping the arm hole of the front  and back piece created just now and the width at the wrist should be few inches less than the top arm hole width. This  you can measure using any full sleeves shirt that fits best and just add or reduce width based of what you prefer.

Now attach along the sides leaving around 12" at the bottom to add side opening. Even this opening size is completely left to your choice.. I have made 12 " side open. 

Collar
Now the only piece left out is for the collar. Take the neckline measurement from where you want the collar to start from to where it should end. Now add 1/2" for seam allowance. Width for the collar piece should be 2.5 " for 1" wide collar. Also cut an interfacing material for collar which is 1" wide * length of the collar piece excluding the seam allowance. Now fold the piece width wise with right sides together. Sew along the end with 1/4" seam allowance at bottom and one side . Now turn it right side out. Tuck in the interfacing you have cut out inside the piping you just made and close the opening edge foding it to inside. Now attach this to neck .  Finally hem the ends of hands and the bottom . Also dont forget to sew the open sides before working on bottom hem.

If you do have serger it would be really help in finishing the seams..

SO now you are done with making Kurta.. Do comment if you need any help or any step is misleading you. Happy Sewing ....


Tuesday, October 11, 2011

Simple Shoulder Bag


Add caption


Just before working on handle & straps...
Bottom part of bag
Chains added for handle
Before adding shoulder straps


Bags, yes that  tends to be a weakness for a big percentage of women around the world... Yeah even I am one among them.. This is a medium size shoulder bag I have made using worsted weight  100% acrylic yarn.. The hook used for the same is J(6.00mm). The bag measures 11" long and 10.5" wide at top and 15" wide in base. The bag is worked from bottom up as one piece  decrementing stitches as you go up.. I have used seams only for the straps.


Pattern:


Note: I would suggest using 100% Cotton Yarn. Avoid using soft yarn..

Ch 55

Row 1: sc in second ch from hook and each ch across, turn(54sc)
Row 2: ch1, sc in ech sc across turn (54sc)
Row 3- 5: Repeat row2

Note:  All rows from now on should continue around and should not turn…

Round 6: sc in each sc across(54sc), 5 sc along sides, sc along the bottom of chain    (54sc) continue sc along side (5sc) . Total 118sc
Round 7: sc in first sc of row6 and continue doing sc in each sc across.(118sc)
Round 8- 9 : Repeat row 7
Round 10 : Hdc across every sc ( 118hdc)
Round 11: sk first hdc,*(sc, ch2, hdc) in next st, sk next st, Rep from * across ending with sc in last hdc.
Round 12: 2 sc in first st, then keeping ch2 sts from previous row S-edge clusters in front - 2 sc in BACK LOOP ONLY of each sc across ch 1 turn
Round 13: hdc around
Round 14: HDc around with 10 decrement hdc  in equal distance around( 108hdc)
Round 15-16: Hdc around (108 hdc )
Round 17- 19: Repeat Row 11-Row13
Round 20: HDc around with 8 decrement hdc  in equal distance around . (100hdc)
Round 21-22 : Hdc around (100hdc)
Round 23-25 : Repeat Row11-Row13
Round 26: Hdc around with 6 decrement hdc in equal distance around (94hdc)
Round 27-28: HDc around (94hdc)
Round 29- 31: Repeat Row 11-Row13
Round 32-34:  Hdc around (94hdc)
Round 29- 31: Repeat Row 11-Row13
Round 32:    hdc around (94hdc)

Handles

For handles Mark the centre stitch on both side of the bag, then place markers 5stitches away from the centre on left & right for both sides of the bag.

Round 33: sc around till marker , ch 10, continue sc around till next marker, ch 10, continue sc
Round 34: Sc to first sc of last row, sc till the chain, 10sc in ch, continue sc till next ch, 10 sc in ch, continue sc till end..
Round : 35-37: sc around..  Fasten off..


Shoulder Strap :

Attach yarn where you want the shoulder strap to be then ss to 5 stitches along then ch 1 turn,

Row1: sc in 5sc , turn
ROw 2: ch 1, sc in next 5 sc turn

Now continue row 2 until you reach the desired shoulder strap length for your bag. NOw ss to the opposite side of the bag in 5 stitches. FInish off. Weave in ends..

Please feel free to leave a comment if you come across any problems in this pattern..

I will be glad to help you out...

Thursday, September 29, 2011

Baby set


Summer passed by in the blink of an eye. The winter is just weeks away. So just thought will give a try on making a hat and sweater for my little one. I have used lion brand(worsted weight) 100% cotton yarn to make this set. http://cache.lionbrand.com/yarns/kitchen.htm
color: seaspray. I bought it from Hancock fabrics on sale. 

Hat pattern:

Round 1: Magic Ring ch 2.,(Or Ch 4 slip st)   10hdc in ring.  join to top ch of ch 3.
Round 2: Ch 1. 2 sc in each hdc around. (20 sc)  Join to ch.
Round 3: Ch 2.  *2 hdc in next sc.  Hdc in next sc.  Repeat from * around. (30 hdc)  Join to top ch of ch 3.
Round 4: Ch 1.  Sc around.  (30 sc)  Join to ch.
Round 5: Ch 2  *2 hdc in next sc.  Hdc in next 2 sc.  Repeat from * around.  (40 hdc)  Join to top ch of ch 3.
Round 6:  Ch 1.  Sc around.  (40 sc)  Join to ch.
Round 7:  Ch 2.  *2 Hdc in next sc.  Hdc in next 3 sc. 2 Hdc in next sc, Hdc in next 4 sc* Repeat from * around.  (50 hdc)  Join to top ch of ch 3.
Round 8:  Ch 1.  Sc around.  (50 sc)  Join to ch.
Round 9:  Ch 2.  Hdc around.  (50 hdc)  Join to top ch of ch 2.
Round 10: Ch 1.  Sc around.  (50 sc)  Join to ch.
Rounds 11: Ch 3, Dc around (50 dc) Join to ch 3.
Round 12-13 : Repeat Rnd 11.
Round 14: Repeat Round 9
Round 15-16 Repeat Round 11. Also decrease 4 dc across.(total 46dc)
Round 17 : Repeat round 9.(46dc) Fasten off and weave in ends...

Flower Pattern:
Round 1 - ch 10, join with ss to 1st ch.
Round 2 - * ch 3, sc in ring*. repeat from *-* 8 times.
Round 3 - ss in first ch3 space, ch1, 3 sc in same space and in each ch3 space around, slst in beg ch1.
Round 4 - *[1sc, 1dc, in first sc][2 trbc in second sc][1dc, 1sc in third sc] in each set of 3sc*. repeat from *- * 4 times . join with slst to first sc. Fasten off.

The pattern was written after completing the hat. SO let me know if you come across any problems.

You can find the pattern for sweater in the link below:

I have made few modifications for the pattern as follows:

Hook Size : I 
Yarn : Worsted Weight

Starting chain 48

Just before working on armholes

I made 9 lace rows instead of 12 and next 3 rows I did sc around.
I did not do the sleeves now. I might  do it later stage if required.


Arm holes added and working on lace rows


Completed sweater with buttons added.

Friday, September 16, 2011

Skirt

Final look....
6 pieces marked to cut
 This is my trial with sewing skirt for first time..  I am quoting the instructions to do this skirt here. This is stretch fabric I bought from jo-ann store clearance section for just $3 for yard.


Here I give the details based on my measurements. You can modify it for any size.

You can use cotton/knit or any other fabric which you think works best for a skirt.


Finishes waist/hip (the size of the skirt where it stays): 32"

Length: 21"

Materials :
Fabric 45" wide: 1 1/4 yard, Thread , Sewing machine...

Attach 3 pieces together as shown for front and back. Then attach front and back

sewing the back and front pieces together

Waist band sewn with right side together
Instructions:


1) Take your waist/hip(depends on where you want the skirt to stay) measurement. let it be X ( for me it was 32").
Cut 6 pieces of fabric as in picture: for  each piece top part should be X/6 + 1/2"(for seam allowance).
 bottom should be  2*(X/6) + 1/4 + 1/4" (seam allowance on both sides)

2) Cut another piece for band.( If you are using stretch fabric you can make the yoga pant style band for skirt else you can use elastic inside your waist band..)
a) if stretch fabric cut waist band:   4" + 1/2" width by length (just make it few inches shorter than your waist size depending on the stretch of the fabric)

b) if non stretch fabric: cut 4" + 1/2" wide *  X +1/2" length for waist band. Also take elastic few inches less than X based on stretch of elastic.

Now sew the 6 pieces together with right side facing.. SO now you are almost done with just bottom hem and waist band left. Also one you are done with sewing 6 pieces together just check to see if the measurement on top of the skirt that is formed now is X" long.

Next is to sew along the waist band that you have cut to the skirt and hem the bottom at the end..


So that is all with this skirt. Hope it is easy to do...


If you come across any issues in between. Just put a comment and I will be happy to help...
Happy sewing ...

Monday, August 1, 2011

Ruffle dress

I love ruffle dress. It is just so adorable to see little ones wearing dress with ruffles. Not just little ones even it really looks great on adults too. SO here is my new try with ruffles. I really did not decide on creating a ruffle dress when I bought this fabric. So finishing this dress was a real tough task for me with just half yard of fabric. The ribbons added did help me a lot to add up a few inches to the dress and give ruffles a better look. 
Add caption
First row ruffle with ribbon


Second Ruffle added but with no ribbon attached.. Make one more row with ribbon and 2 rows with no ribbon at top
 Size: 6months

Materials:
1/2 yard cotton fabric(3/4  yard would be better to get better ruffles).
1 red polka dot satin ribbon roll.
Zipper for back ( optional)

Measurements:
Take measurements from a best fitting dress for the baby. Cut 4 pieces, 2 for upper front and back , 2 for  lower part back/front. The ruffles in this is done for front only.
For ruffles cut 5 pieces of fabric 3" wide and double the length of the front trapezoid cut as shown in pic..
Sew in ribbon to the first and third ruffle bottom. 
Attach the ruffles to the lower front  part  as shown in pic on right.

Attach ribbon for top front as seen in pic. now placing right side together attach the top front and back together. Same was attach the lower part and then sew in the top and bottom. 

Cut 2 pieces of fabric 1" wide and length required for straps . Attach the straps to the dress and you are ready to go. This is for the first time I am writing instructions for a sewing project. So do let me know if you come across any problems.. I will be happy to help...